How to deal with an error message when HP 414A cartridge is just installed?
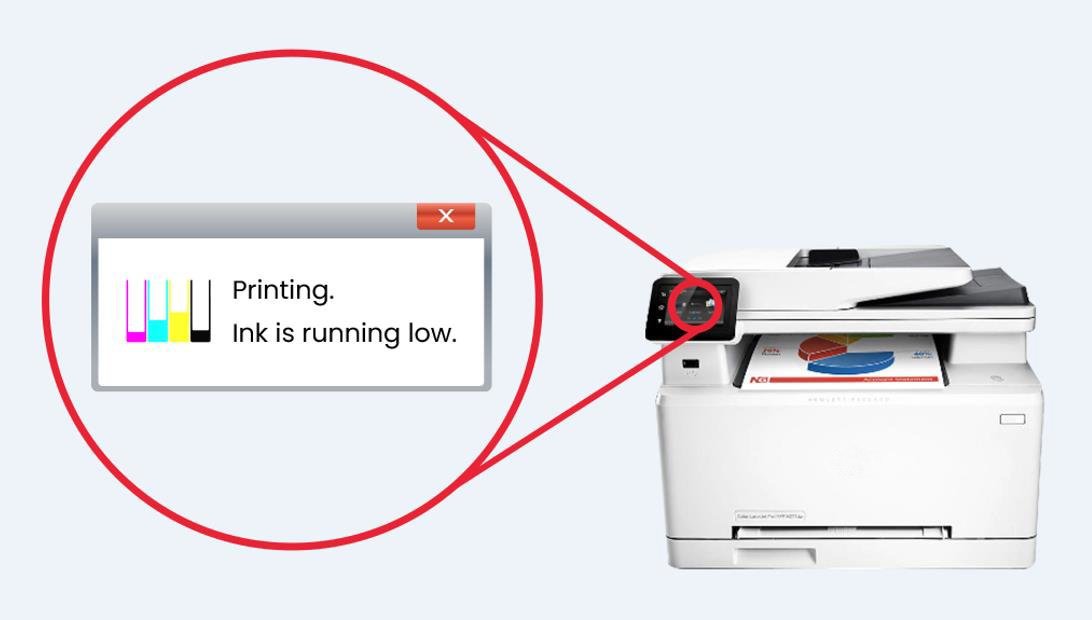
Have you faced the situation when you just installed a new HP 414A or HP 414X black cartridge, your printer still reminds “Cartridge Low”? You can clearly feel that there is enough toner inside when you shake the cartridge. But your printer just would not allow it to work.
Due to the special specifications of this product and the wide variety of products on the market, a problem may have resulted from several causes. If you don't know much about the product, you may mistakenly think that you bought the wrong product or discarded the correct product. So, in this article, we will explain how to handle it when having a problem.
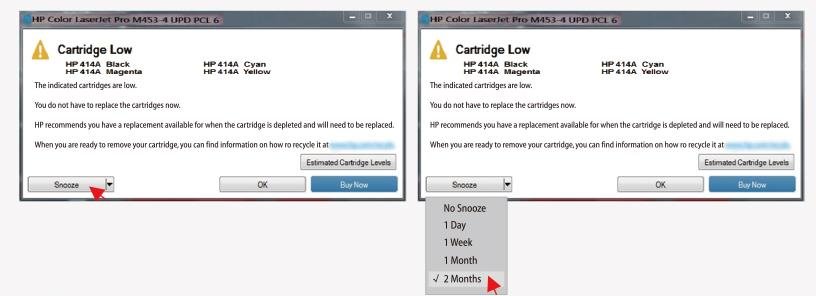
Problem 1: “Cartridge is low” or “Cartridge is very low”
If a new HP 414A is just installed, your printer still pops out the message.
Recommended action:
Step 1: Check the cartridge is coming along with chip or not.
Since these cartridges need to work with security chips, many aftermarket cartridges do not have a chip. If this is the case, you will need to remove the chips from the empty cartridges and insert them into the new cartridges.
The following is the video to show you the installation instructions. If you purchase v4ink 414A toner cartridges, there is an extra tools kit in the package to help you operate easily.
Step 2: Make sure you have installed the chip correctly.
After the chip is installed, double-check that it is placed in the correct position.
In the wrong orientation or position, the ink cartridge may not be detected.
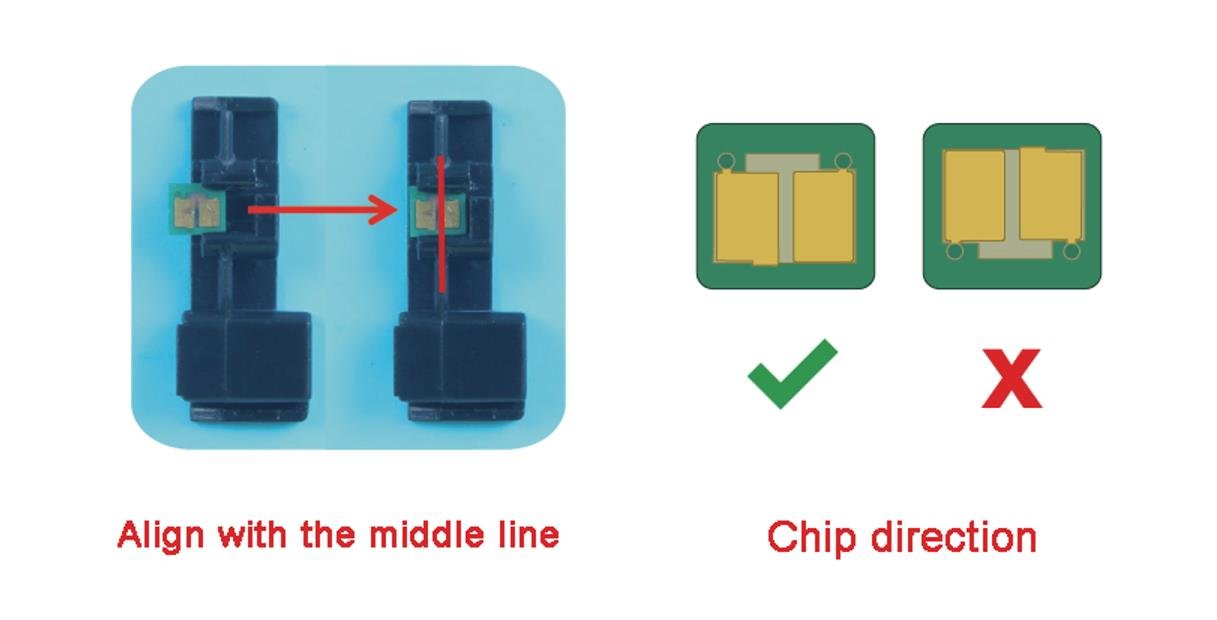
Step 3: Do not mix-use chips with toner cartridges of different colors.
Since there are 4 packs of toner cartridges in black, cyan, magenta, yellow and chips from different color cartridges record different information, do not install a chip of a black cartridge into a magenta cartridge.
Step 4: Bypass the message and continue to print.
If you confirm that the chips have been installed correctly or the one you purchased are HP 414A remanufactured toner cartridges which come along with OEM chips, you could just go ahead to print by ignoring the pop-up.
If your printer is connected to your computer, here's a way to show you how to close the pop-up.
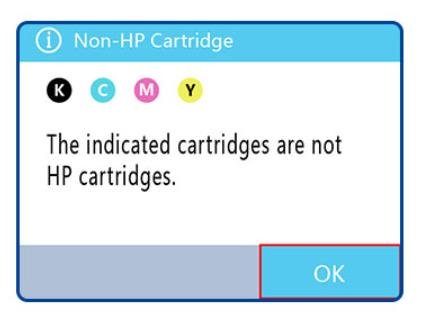
Problem 2: “Non-HP Cartridge”
This message will pop up when the printer detects a non-HP electronic chip. This happens when a compatible cartridge is installed, which has a chip developed by a 3rd party. Just like v4ink new compatible 414X cartridge with chip. These cartridges contain new R&D chips that consumers could use right out of the box. What’s more, it enables the machine to display the actual ink levels.
Recommended action:
So when you find this message, please don’t worry. It’s a way for OEM manufacturers to protect their own supply chain. You could press “OK” and continue to print.
Problem 3:"Supplies Memory Error” or “Event Code: 10.00.00”
This message appears when the printer cannot communicate with the indicated supplies.
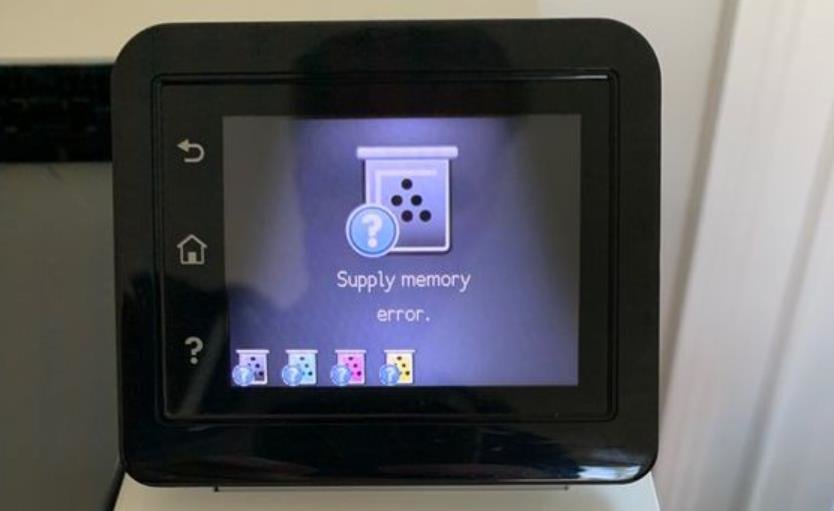
It also shows up as "Event Code: 10.00.00" on some specific machines.
10.00.00 Black toner cartridge
10.01.00 Cyan toner cartridge
10.02.00 Magenta toner cartridge
10.03.00 Yellow toner cartridge
Recommended action:
Step 1: Take out the indicated toner cartridge and reinstall it.
Step 2: If the message persists, take out the cartridge and turn the printer off, and then on.
Step 3: Check to see if the toner chip is covered with stains, glue, or dirt. Gently wipe the surface of the toner chip with a non-woven fabric dampened with industrial alcohol.
Step 4: Press down on the chip location to ensure proper contact with the printer probe.
How to avoid the error message before beginning?
Because sometimes OEM manufacturers would update systems or firmware to block 3rd party supplies, here are some ways to avoid the messages if you decide to use compatible cartridges.
Step 1: Click: "Setup" -> "System Setup" -> "Supply Settings" -> "Cartridge Policy" -> "Off";
Step 2: Click: "Setup" -> “Service” -> “LaserJet Update” -> "Manage Updates" -> "Check Automatically" -> "Off" -> "Allow Updates" -> "No"
")